1A tool to engage your guests
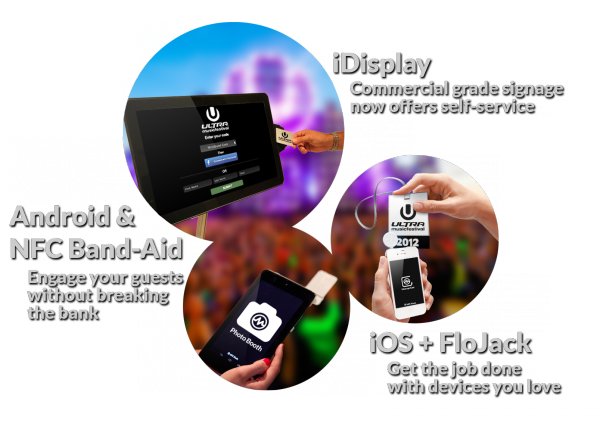
The NFC Kiosk system registers guests, takes photos, scans activities, and reports it all in real time so you make your events more personal than ever. Know who your guests are, where they’re from, what they like, and capture the moment when they’re loving you most. Reward best behaviors!
2A way to automate content distribution
With NFC Kiosk, audiences aren’t limited to the guests attending. When they register with Facebook you can ask for permission to automatically post photos, status posts and check-ins to their accounts on their behalf. At the same time you can post to corporate Facebook pages and email accounts.
3A guarantee to deliver on time & inside budget
The NFC Kiosk app is available for Android and iOS, and the management service ties right into your existing Flomio account. We have a flat fee model for one off events and monthly subscriptions that provide awesome savings for regular users. To top it off, Flomio’s extensive family of NFC assets turn your NFC Kiosk into a powerhouse of interactivity. Discover how you can engage your customers in a new and affordable way with NFC Kiosk.
4To get started you will need:
- PC with web connectivity
- NFC-compatible Android device with web connectivity – Nexus S, Nexus 4, Nexus 7, Nexus 10, etc.
- 3 or more NFC Type 2 tags – Mifare Ultralight, NTAG203, etc.
- Flomio.com account with Events Engagement product activated
Instructions:
Step 1) Create an account on flomio.com.
Step 2)  From your My Account screen, click Add under Events Engagement and enter an event name. Your event will be created at the unique URL, https://yourevent.flomio.com. This URL will serve as the public registration page for your event. Note: If you don’t see this feature, contact us to request it be added to your account.
Step 3)![]() Once your event entry is created, three private pages -Admin, Leaderboard, and Charts- will be linked below it. These allow you to manage and monitor your event’s engagement in real-time.
Once your event entry is created, three private pages -Admin, Leaderboard, and Charts- will be linked below it. These allow you to manage and monitor your event’s engagement in real-time.
Step 4) Starting with the Admin page, you can integrate a Facebook app for the event, provision NFC tags with shortened codes, and configure the name+message for each NFC Kiosk Terminal you will use at the event.
Step 5) To create your Facebook app, log in to Facebook and go to “Manage Apps” in your Account menu. If you don’t see this option in your Account menu is because you have signed up as a Facebook Developer before. To do so go to https://developers.facebook.com and click the “Apps” tab in the navigation bar. Log in with your same Facebook account and accept the terms and conditions. Now you will be able to create Facebook apps.
Step 6) Click “+ Create New App” and fill in the dialog with the same event name you chose in Step 2 (no required but makes it easier to keep track). Fill in the Captcha and your Facebook app will be created.
Step 7)![]() In the new Facebook app, set the “Sandbox Mode” to “Disabled” and fill in the “Website with Facebook Login – Site URL” with https://yourevent.flomio.com. Click “Save” to commit your changes.
In the new Facebook app, set the “Sandbox Mode” to “Disabled” and fill in the “Website with Facebook Login – Site URL” with https://yourevent.flomio.com. Click “Save” to commit your changes.
Step 8) Now copy the Facebook App ID and App Secret for your event app and paste them into the Admin form. Now your guests will be able to identify themselves with their Facebook accounts at every NFC Kiosk Terminal your deploy at your event.
Step 9)![]() In order for your guests to authenticate with Facebook, they need a secure NFC tag that you’ve provisioned for your event. We sell all styles on our NFC Shop, but the most popular are wristbands. To provision tags you will need to enter their UUID in the “Wristbands” field superseded by a shortened number code. The format is Code,UUID without any spaces and one entry per line. So, 0001,04F6A67A712880 would be a valid entry. Also, each Code entry should be unique within the wristband list.
In order for your guests to authenticate with Facebook, they need a secure NFC tag that you’ve provisioned for your event. We sell all styles on our NFC Shop, but the most popular are wristbands. To provision tags you will need to enter their UUID in the “Wristbands” field superseded by a shortened number code. The format is Code,UUID without any spaces and one entry per line. So, 0001,04F6A67A712880 would be a valid entry. Also, each Code entry should be unique within the wristband list.
Step 10) Now guests can go to https://yourevent.flomio.com/code , enter the shortened number code provided with their wristband, and associate such wristband to their Facebook or Email account.
Step 11) With registered wristbands in hand, guest can now engage with NFC Kiosk Terminals. To create Terminals you will need to install the NFC Kiosk app on NFC-enabled Android devices. The Nexus line of devices are an ideal choice because of their price and compatibility. Once installed, launch NFC Kiosk and tap-and-hold to bring up the application’s menu. Select “Choose Event” and fill in the form with your event URL and Flomio account credentials.
Step 12) Press “Go” and you should get a “Logged in” notification. This will trigger a new Terminal entry on our event’s Admin web page. You can now configure the Terminal Name and Message that will post to the Leaderboard and Facebook.
Step 13)![]() The NFC Kiosk app has basic access control features. Scanning an NFC tag that is not provisioned for the event (see Step 9) will generate a RED background flash. Scanning an NFC tag that has been provisioned but not associated to a Facebook or Email account will generate a YELLOW background flash. Only scanning an NFC tag that has been provisioned and associated to a Facebook or Email account will generate a GREEN background flash. If you’re experiencing issues, going to Config from the app menu will provide further insight.
The NFC Kiosk app has basic access control features. Scanning an NFC tag that is not provisioned for the event (see Step 9) will generate a RED background flash. Scanning an NFC tag that has been provisioned but not associated to a Facebook or Email account will generate a YELLOW background flash. Only scanning an NFC tag that has been provisioned and associated to a Facebook or Email account will generate a GREEN background flash. If you’re experiencing issues, going to Config from the app menu will provide further insight.
Step 14)![]() By now you should have a connected NFC Kiosk Terminal and some provisioned and associated NFC tags to play with. Time for some fun. Click on the “ScanCast” tab at the top of the Admin page.
By now you should have a connected NFC Kiosk Terminal and some provisioned and associated NFC tags to play with. Time for some fun. Click on the “ScanCast” tab at the top of the Admin page.
Step 15) ScanCast is a real-time capture of all the engagements of your event. Scan your provisioned NFC tags and you’ll see the number of scans count up. Scan associated tags and you’ll see personalized messages pop up on the timeline. You’ll also notice the bar graph on the bottom right increase on every scan from your NFC Kiosk Terminals. This can be used to game-ify your event and see what terminal gets the most checkins.
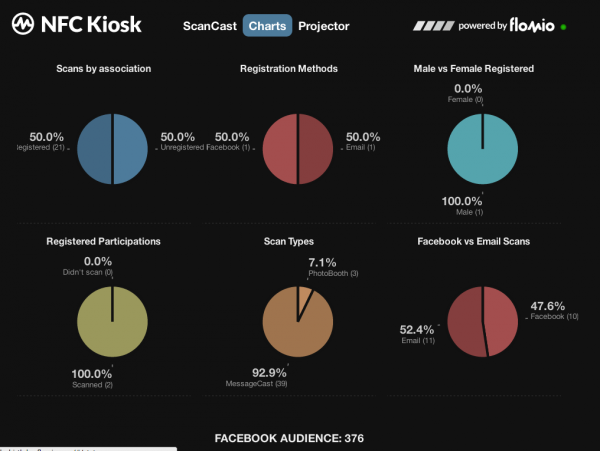
Step 16) Next select the “Charts” tab at the top of the page. This is a real-time capture of all the analytics about your event. Everything from association breakdown to male/female ratios to entire Facebook audience. All the information you need to prove the impact of your event.
Step 17) Next select the “Projector” tab at the top of the page. This works in conjunction with the Photobooth feature on the NFC Kiosk Terminal. Scanning an associated NFC tag in Photobooth mode enables the device to countdown and take a picture. The Projector then tags, watermarks your branding, and displays the picture in a fun slide show. This is perfect for projecting onto a wall at your event so everyone can see the fun pictures being captured.
Step 18)![]() Send us your feedback! If you would like to try this product out on a large event (100+ people), we can help! We provide custom services and competitive pricing from wristbands to readers to online software. Contact us for more info.
Send us your feedback! If you would like to try this product out on a large event (100+ people), we can help! We provide custom services and competitive pricing from wristbands to readers to online software. Contact us for more info.
HOW TO Video (17mins):

